 Allison Reams Photography
The Forests Now Gone – A Closer Look

My project “The Forests Now Gone” has always attracted a lot of attention and posed many questions, both on its message and the method I use to execute each image. This post will not go into the message behind each image but will shed some light on my process for making them.
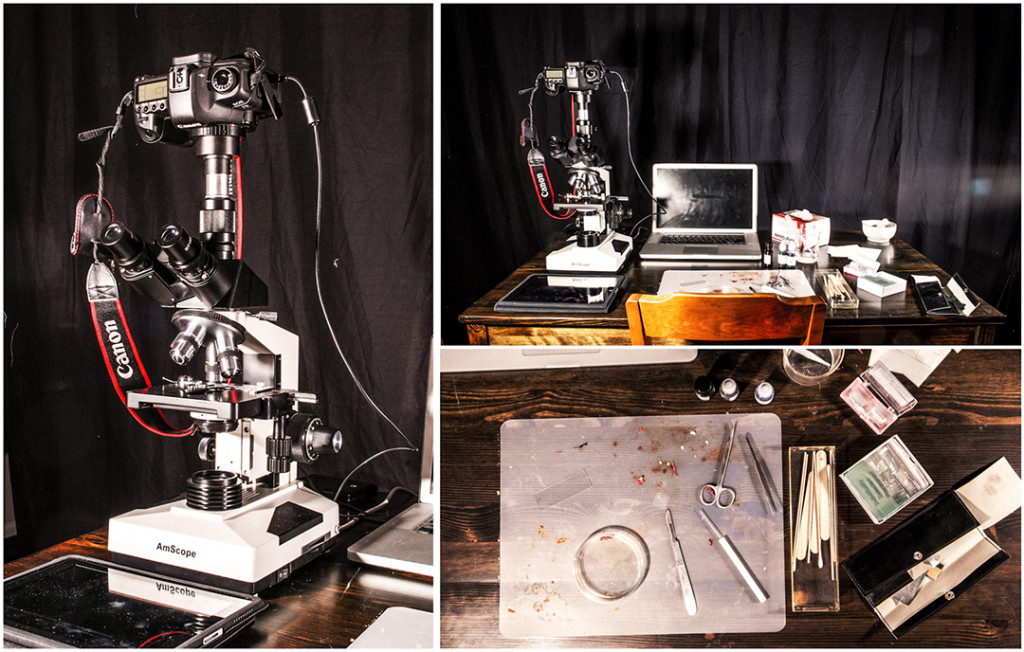
My process is split into two parts. The first being acquiring my content images. The first step is to prepare slides of the substance needed for each specific image. Next I photograph them using a microscope fitted with a camera adaptor. The process of photographing has to be completely hands-free. The exposures range from 1 second to 2 minutes and touching the camera would compromise the image. To solve this problem I use a program from OnOne that allows me to control all the cameras functions on an Apple device: iPhone, iPod, or iPad. The camera is tethered to a laptop where the images are wirelessly transferred to. The biggest challenge of this part of the process is focusing. It is very difficult to judge the focus, as the image in the viewfinder is slightly different from the image being taken. There is also a slight blurring effect around the edges of each image. If anyone reading this has ever used a Lensbaby they will know this effect. In the end each slide could take 50 frames to get the right image.

The second part of this process is all done in Photoshop CS6. I create a template of the image using coloring book pages, using a separate image for each aspect of the template. When it comes time to drop in the microscope images I use these pieces of the template as a means of selecting where each will go. First I place the microscope image over the wanted area, then hide the image by clicking the eye in its layer. Using a wand tool I select the area around the template piece. Once that area is selected I invert the selection so that the desired area is selected. With that area selected I select and reveal the microscope image layer. Then I create create a mask by clicking on the mask icon found third from the left at the bottom of the layer window. To add detail back in the image I use a second microscope image just in the blacks of the template. To select the just the blacks I use the Color Range selection tool. The steps for this are a bit different from the first process. As before you place your microscope image first. Hide all the layers apart from the template piece you want to select from. Go to Select > Color Range and a window will open. Here you can do one of two things. One, use your eye dropper to select the blacks or two, select the area around what you want to select making sure the “invert” box is checked. Now reveal all the layers your hid. Create a mask for the microscope image. The selected area should show where you made your selection. Repeat this process till you have completed your image.
